
Hey friends! Today I’m sharing how I made a pottery barn inspired garment rack for a fraction of the cost. This is a really simply DIY project that even someone with no crafting or DIY skills can accomplish. Here’s the inspiration:
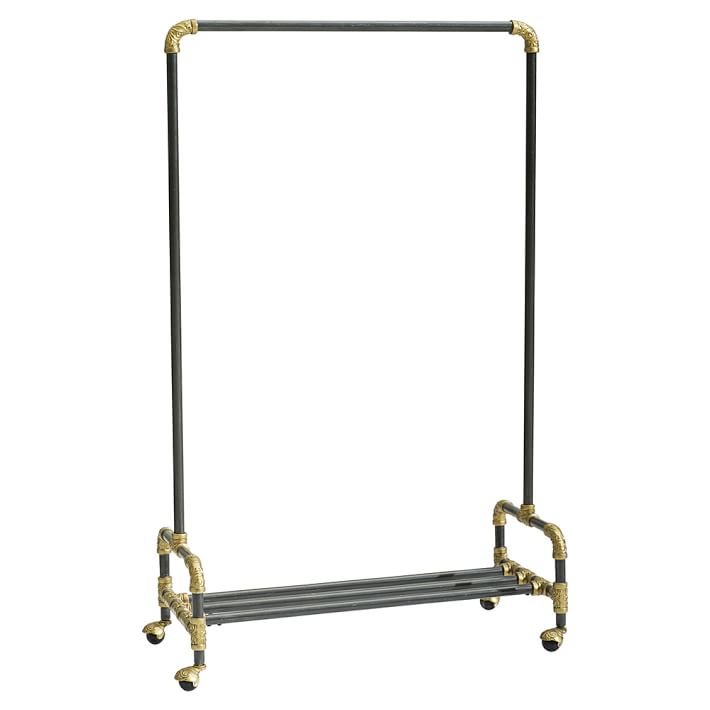
Beautiful right? But not for $300!! So, I searched Pinterest and decided to add a wooden shelf. Well, I actually decided to add two, like this, but it didn’t work out, more on that later. After making the plan, I went to Home Depot for the supplies. Here’s what you need and how much it costs:
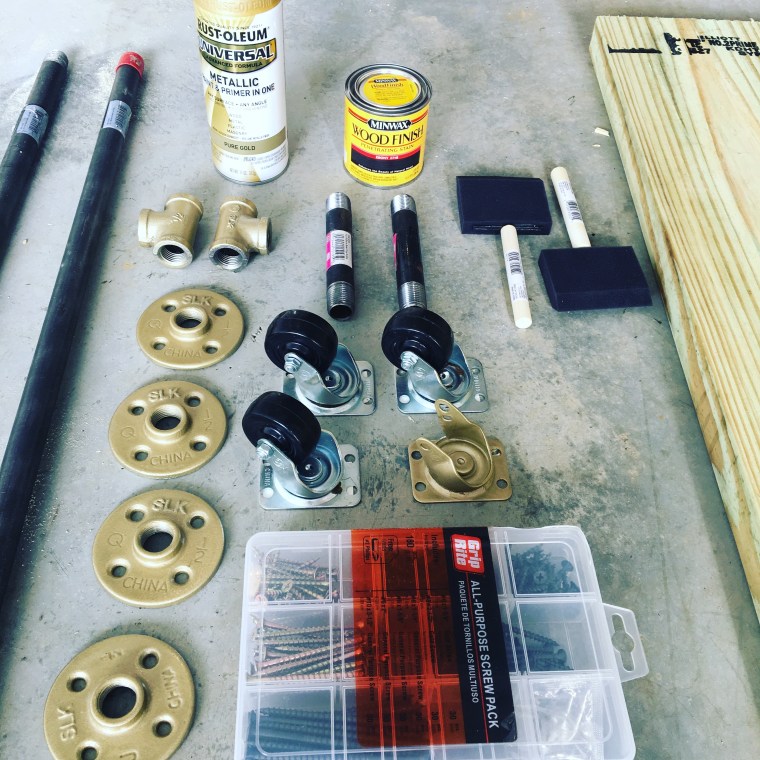
- 4 wheels – $3.44 each
- 2 flanges (this is what attaches the pipe to the wooden shelf) – $4.64 each
- 2 60 in long, 1/2 inch wide pipes (found by plumbing) – $11.98 each
- 1 36 inch long, 1/2 inch wide pipe (this is the one across the top) – $9.36
- 2 connectors – $2.32 each
- Spray paint if you want your accessories to be gold, or any other color – $6.76
- Screws – we got an assorted pack for $7.97
- 40 inch long, 10 inch thick wood board (for the shelf) – $14.97
- Wood stain & foam brushes (optional) – $4.78 (stain) and $0.97 for each brush
- TOTAL: $98 (give or take a few dollars and cents)
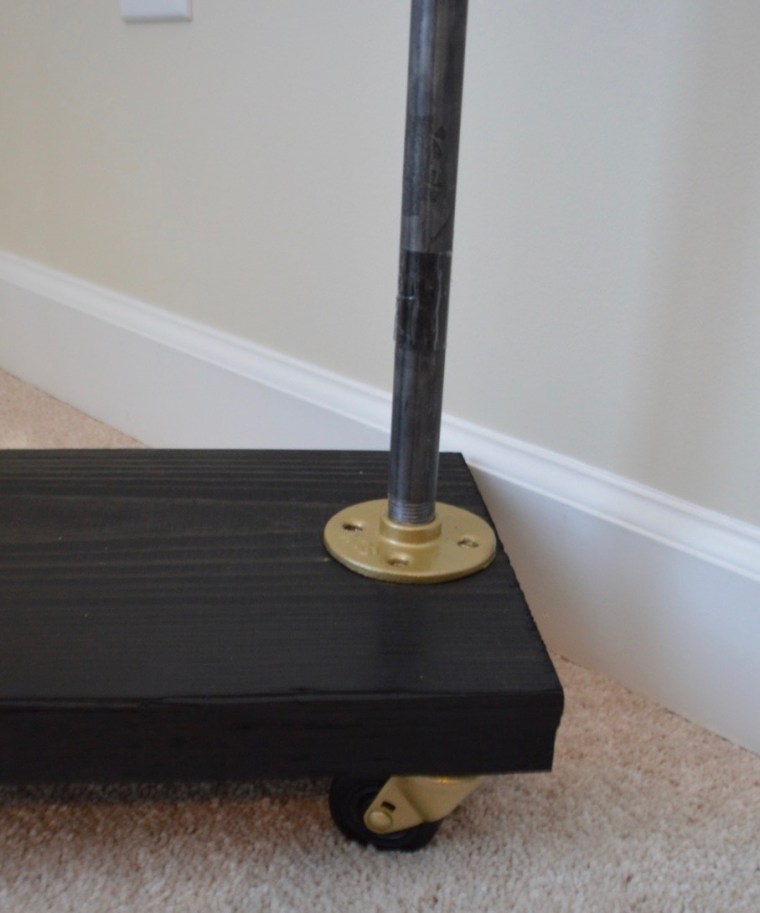
You can see in the picture above that I had 4 flanges, and like I said earlier, I planned to put a top shelf and a bottom shelf. However, when we were assembling the rack, I really didn’t like the top shelf. It was too high for me and made the rack too heavy looking. Instead, I scrapped the idea of the top shelf. We are in the process of replacing the connectors with these, so that there will be a rounded edge where the pipes connect.
If you choose to stain your wood or spray paint your accessories, do this first. Then, the assembly is a breeze and doesn’t take more than a few minutes. Follow these steps:
- Connect the wheels to the bottom of the wood shelf.
- Attach 2 flanges on the top of the wood shelf, one on each end.
- Screw in your two long pipes to the flanges.
- Connect your crossbar using the connectors you bought, it should just screw in.
- Hang your clothes!
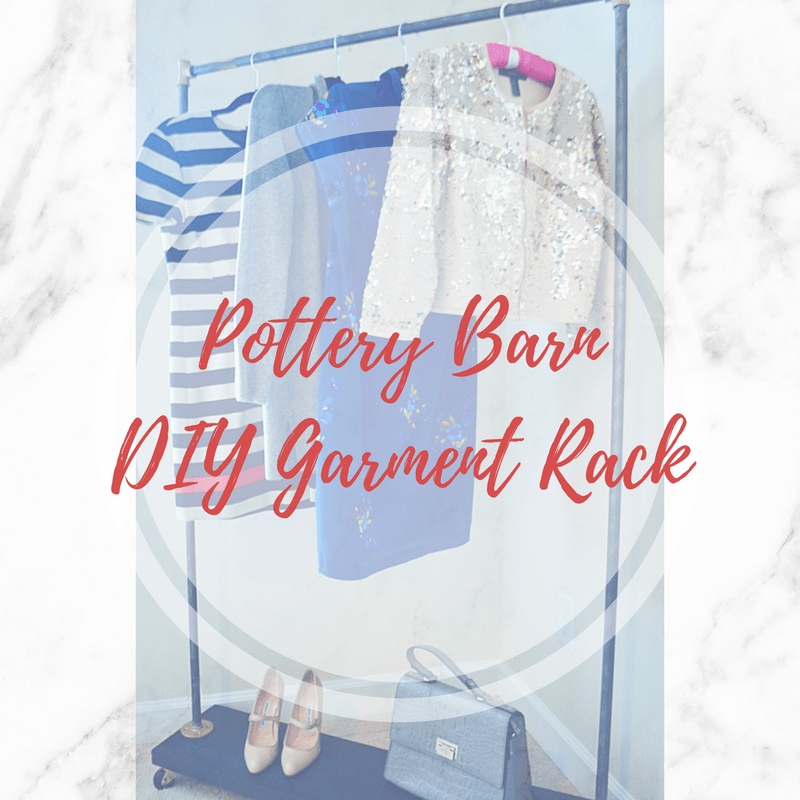
Here’s what my finished product looks like
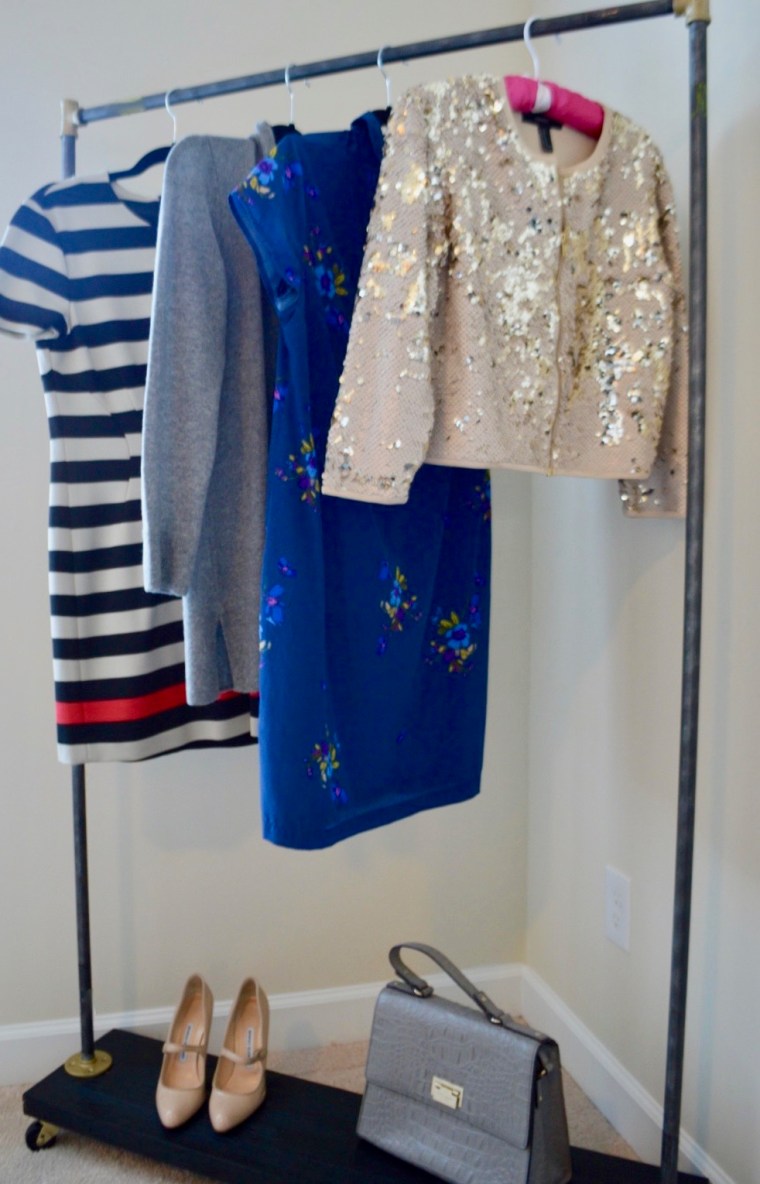
It’s a perfect addition to help plan my outfits for the week and can easily wheel into my closet or into the guest room when we have visitors. Have you made something similar? Let me know!
